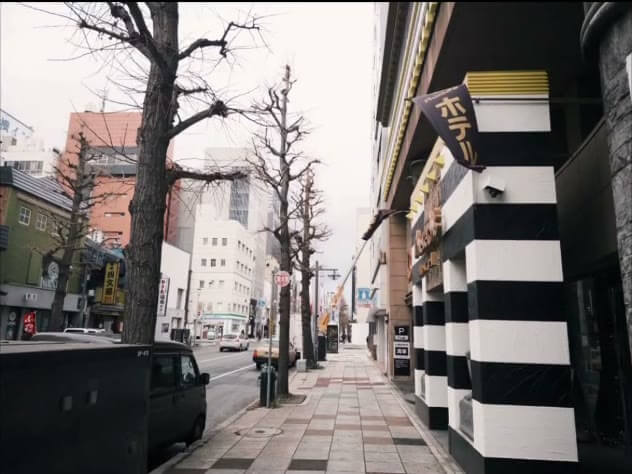
Rangefinder viewfinders do not show what your lens sees; they show what the street is doing. Unlike single-lens reflex mirrors that black out on exposure or electronic viewfinders that isolate you inside a cropped digital feed, an optical rangefinder window keeps your peripheral vision active. Mastering composition with a 35mm rangefinder means learning to anticipate motion across brightlines before subjects enter the recorded frame.
Track the Outside of the Projected Framelines
A rangefinder optical window presents a fixed magnification field—typically 0.72x on classic 35mm bodies like the Leica M6, Zeiss Ikon ZM, or Bessa R2, and 0.91x on the portrait-biased Leica M3. Framelines for your mounted focal length appear as floating illuminated rectangles inside a significantly wider optical view. When you mount a 35mm lens on a 0.72x body, roughly 15 to 20 percent of the visual field outside the brightlines remains visible to your dominant eye.
This structural offset fundamentally changes how you organize a frame. Instead of hunting through a tunnel or searching for subjects within a closed box, you compose by establishing your background geometry first and then holding the frame steady while monitoring the surrounding street. Watch pedestrians, cyclists, or stray dogs moving through the exterior peripheral zone. Because the optical window never blacks out when the cloth shutter curtains release, you observe the precise millisecond a stride lands, an arm gestures, or eyes turn directly into the frame.
Keep both eyes open while tracking moving subjects. Your left eye retains natural peripheral awareness of street hazards, shifting light, and approaching crowds, while your right eye registers the floating 35mm brightlines. When an approaching subject crosses the outer perimeter, trip the mechanical shutter at the exact threshold where their movement balances the negative space inside the framelines. This technique eliminates framing guesswork and turns composition into an active waiting game.
Zone Focus at f/8 to Eliminate Focus Lag
Attempting to align the center split-image rangefinder patch on every fleeting street encounter guarantees missed exposures. The optical coincidence mechanism requires high contrast and horizontal alignment, both of which disappear when a subject moves briskly through dappled shade. Professional street photography with a 35mm rangefinder relies instead on depth of field scales engraved directly onto manual lens barrels.
When you mount a 35mm lens, stop down to f/8 or f/11, and align the focus index to 3 meters (10 feet), the physical laws of optical circles of confusion deliver acceptable sharpness from 1.7 meters (5.5 feet) out to infinity. A 28mm lens pushed to f/8 broadens this working corridor further, rendering every element between 1.3 meters and infinity in crisp focus without a single mechanical delay. You pre-set your exposure to 1/500s at f/8 using an ISO 400 emulsion in full daylight, set the focus ring to your chosen encounter distance, and keep your fingers still.
Street photographers develop tactile muscle memory using the lens tab under the barrel. On a Leica Summicron 35mm or Voigtländer Nokton Classic, the finger tab points straight down at the 6 o'clock position when focused to 1.2 meters, rests at roughly 7 o'clock for 2.5 meters, and tucks flat toward the body mount at infinity. By touching the tab with your index finger while walking, you set your focus zone by feel alone before lifting the camera to your eyebrow.
Compensate for Parallax Offset Within Two Meters
Because the optical viewing window sits approximately 40 millimeters above and 65 millimeters to the left of the taking lens barrel, the viewfinder axis never completely matches the optical axis of the recorded 36x24mm film negative. At distances past 5 meters, this spatial discrepancy is negligible. When working inside two meters—the critical working distance for intimate street portraits and dynamic sidewalk gestures—parallax error can sever heads, crop hats, or skew deliberate foreground-to-background alignments.
Mechanical rangefinders incorporate parallax-correcting framelines linked directly to the rangefinder cam. As you rotate the lens barrel toward the minimum focus distance of 0.7 meters, internal linkages push the brightline masks diagonally downward and inward across the optical field. The framelines physically shrink and drop to delineate the actual field of view recorded by the lens. However, while framelines reposition their boundaries, they cannot alter your vantage point. The lens sees around foreground shoulders and behind vertical light poles at an angle distinct from your viewing eye.
To compose accurately at close range, leave a deliberate 10 percent safety buffer inside the top and left frameline borders. When framing a subject's head at 1 meter, position the top edge of their hair slightly below the upper frame mark rather than kissing the boundary. Anchor primary visual weight toward the center-right of the viewfinder to guarantee that perspective compression remains true to your compositional intent once the negative is developed.
| Focal Length | Aperture | Focus Index | Depth of Field Near–Far | Parallax Shift Factor |
|---|---|---|---|---|
| 28mm | f/8.0 | 2.0 m | 1.1 m to Infinity | Minimal (broad field) |
| 35mm | f/8.0 | 3.0 m | 1.7 m to Infinity | Low (self-correcting) |
| 50mm | f/8.0 | 4.5 m | 2.8 m to 11.2 m | Moderate (tight margin) |
| 35mm | f/2.8 | 1.2 m | 1.08 m to 1.35 m | Critical (-45mm down/right) |
Decouple the Split Patch From Final Geometry
The coincidence rangefinder patch sits dead center in the viewfinder field. Photographers transitioning from modern autofocus cameras frequently suffer from the center-patch trap: they drop the split-image rectangle onto a person's face, adjust the focus ring until double lines merge, and trip the shutter immediately without recomposing. This habit floods the upper third of the negative with dead sky, cuts off limbs at awkward joints, and locks the composition into rigid, uninspired symmetry.
The rangefinder patch functions as a distance measurement gauge, not a framing boundary. When light conditions require shooting wide open at f/2 or f/2.8 where depth of field shrinks to centimeters, separate your focusing step from your compositional arrangement. Align the patch against a high-contrast boundary on your subject—such as a lapel edge, collarbone, or eyelash—merge the coincidence image with a quick flick of the wrist, and immediately swing the camera back to establish your rule-of-thirds, diagonal lead lines, or environmental frames.
Alternatively, pre-focus on a static sidewalk feature before your subject arrives. If you spot a striking shaft of light falling across a concrete column, aim the patch at the column corner, snap the double image together to register the distance at 2.2 meters, and then compose your complete negative. Lower the camera to chest level, wait for a pedestrian to stride into that exact pool of light, raise the viewfinder smoothly, and expose without touching the focus ring again.
Anchor Negative Space Against Harsh Architectural Shadows
Classic street emulsions like Kodak Tri-X 400, Ilford HP5 Plus, or Eastman Double-X 5222 feature steep characteristic response curves when exposed to direct sun. Highlights hold detail while deep building shadows fall off sharply into dense silver deposits on the negative. Rather than fighting high-contrast lighting, rangefinder street composition uses deep shadow blocks as geometric scaffolding to isolate figures and strip away urban chaos.
Divide the 3:2 ratio 35mm frame into architectural mass and negative void. Seek out deep alleyway cuts, concrete awning overhangs, or subway portal entrances where ambient illumination drops three to four full stops below the street pavement (EV 15 down to EV 11). Meter your scene for the illuminated pavement using an incident reading or spot check. By locking your exposure for the direct sunlight, the shadowed architectural facades record as clean, ink-black voids, eliminating distracting storefront signs, parked vehicles, and passing pedestrians from the background.
Position your frame so the black shadow shapes construct strong diagonals or framing arches across two-thirds of the canvas. Wait for your subject to cross the razor-thin boundary where hard light hits the pavement. Because rangefinder viewfinders do not dim or brighten based on camera exposure settings, you see into both highlights and shadows with your natural eye. You must mentally map the film emulsion's dynamic range, anticipating which shadow details will drop to pure black on the negative while keeping your eye trained on the bright aperture of light.